Bring Your Skyscapes to Life!
We'll Investigate Four Basic Concepts and Skills To Inject More Light and Life Into Your Skyscapes.
Skies, and particularly sunsets, can be very powerful in showing us the way back to our connection with the environment. Sunsets & big open skies seem to call to us & connect with us in a way that is hard to define.
In this tutorial, we'll discuss some very basic concepts & skills, to allow you to create your own amazing sky paintings.
When you're painting skyscapes, there's a fundamental skill that needs to be mastered. That is a colour gradation. If you're not able to pull changes of colour together softly, or even sometimes abruptly, than you'll cause yourself a large amount of pain.
We'll also look at perspective, and see how that affects the appearance of clouds. It's easy to see perspective when dealing with straight lines. It is a much more difficult concept when dealing with less structured objects, such as clouds.
We'll look at the use of "atmospheric perspective", to convey depth & distance in your skyscapes.
We'll look at how the light affects our choices of colour.
And we'll look at some simple techniques to create clouds. While they are an important part of most skyscapes, we'll look at them in more detail in our how to paint clouds tutorial page. We won't spend a lot of time investigating the intricacies of painting clouds in this skyscapes tutorial.
We will cover, in more detail, the topics of:
Perspective
Atmospheric Perspective
Light
And represent these concepts in our skyscapes by creating:
Effective, efficient gradations of colour, and
Some simple clouds to reference these concepts
Perspective
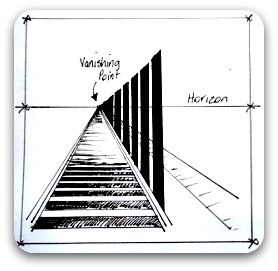
We've all seen the perspective drawings of some perfectly straight lines, like railway tracks, receding off into the distance.
If you haven't seen this drawing, this is what it looks like. Basically the theory is that things in the distance are smaller and flatter, and as they come toward you, become larger.
On a flat plane, parallel lines will merge at the horizon. This point is called the vanishing point. Easy enough to to grasp when you are dealing with straight lines.
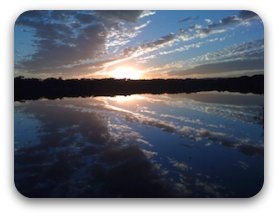
Slightly more complicated though, is perspective when it relates to skyscapes.
There are rarely straight lines in the sky, and clouds are rarely uniform in shape and pattern. Yes, yes, I know, there are exceptions. Of course, if your skyscape has no clouds, then a large part of this painting problem is solved!
The basic theory with this subject is that clouds close to the horizon will generally appear smaller. If there are any lines, or any loose patterns, they'll be subject to the same rules of perspective that buildings and straight lines are. Here are some examples for you.
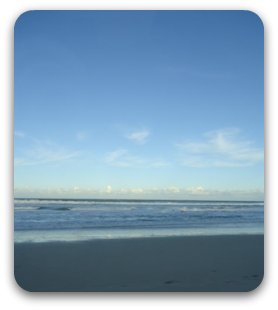
Your homework is, grab a glass of chardonnay (or beverage of choice), and sit on a hill. Watch the clouds. Take some notes. Really notice the difference between clouds that are far away from you, and close to you.
How does the distance affect their shape? Are there any patterns that are altered with distance? Do some quick sketches. Keep it simple.
The object of this exercise is just to observe the varying skyscapes around you, and make notes.
When you understand how to use perspective, your clouds and skyscapes will be more natural and will have wonderful depth.
Atmospheric Perspective
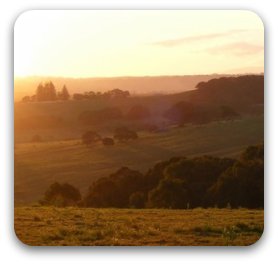
Before you had too much chardonnay, you may've noticed that the clouds in the distance appeared to be different.
They can appear to be paler, or even a slightly different colour. This is due to atmospheric perspective. Atmospheric perspective is most easily explained in this way:
When looking close to the horizon, your eye is generally looking through a large amount of dust (and pollution in some cases). This means that the clouds close to the horizon are tinted by this haze. The further away the clouds, the more "stuff" between you and them.
However, when looking directly upwards, we tend to look through much less interference from the atmosphere, and the clouds (and sky) appear "cleaner".
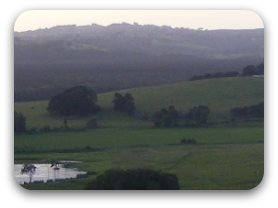
This can often be more noticeable as the sun drops lower, and infuses all the clouds closest to it with light.
When painting skyscapes, understanding how to apply atmospheric perspective is a sensational tool for creating the illusion of distance.
Some great examples of atmospheric perspective can be seen along the skyscapes of the east coast of Australia. The air is full of oils & haze created by the many eucalypts. These tint the mountains, and all things in the distance a gorgeous blue.
Light
Wow. Where to begin. Let's start with a crystal clear day, and a couple of fluffy white clouds. Sounds simple, doesn't it? But... Is it Summer? Is it Winter? What difference will that make to your skyscapes? The light will be different.
In my part of the world, the wind tends to come from the North-East during Summer. That wind is laden with salt spray, and who knows what else. This filters and affects the light.
Winter, on the other hand, often gives us cooler, cleaner South-Westerly winds. This changes the light again. Unfortunately this homework will take you all year! (And possibly dozens of bottles of chardonnay to boot!). While there are differences, it's not as dramatic as the light from a sunset or sunrise.
The point is to take notice of the way the seasons can change the light.
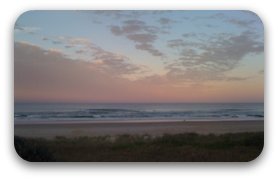
The light thrown around from a glorious sunset is breathtaking. Learning to identify and paint the colour shifts in a sunset, is a more complicated affair.
Let's look at some basics.
As a general rule, the closer to the light source (ie sun), the warmer the colour.
The further you travel from the light source, the cooler the colours.
Watch your sunset, and notice the shift in hues from the clouds that are closest to the sun, to those that are further away. There will be a gradual progression from warm through to cooler. That shift in colour will often happen in individual clouds as well.
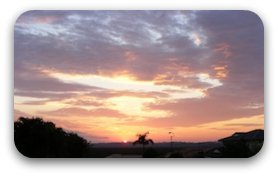
Fundamentally, that is the overriding rule when painting skyscapes.
It is very difficult to go into too much detail regarding this without taking up 40 pages or more. Truthfully, I wouldn't put you through it. It hurts my head!
For me, it is enough to understand the shift from warm through to cool (more on that in a minute) and to develop some simple skills. This knowledge and some ability with a brush, along with close observation, should initially get you through painting realistic skyscapes.
Let's move on to some painting skills.
Gradation of Colour
You may've heard me bang on about this before. And I'm happy to admit I sound like a broken record! BUT! Master gradation, and almost everything you paint becomes much easier.
Painting skyscapes is a perfect example. As a skill, I like people to master a very smooth and even gradation of colour. However, Impressionists for example, do not paint that way.
I suggest that if you can paint a perfectly even gradation, you can then paint a looser version easily. Aim for the moon and hit an eagle, I say - better than aiming for the eagle and hitting a rock.
Now, a couple of simple gradation exercises to illustrate the basics of painting skyscapes!
Exercise One
You will need:
▪ Medium canvas
▪ French Ultramarine Blue
▪ Pthalo Blue
▪ Cadmium Yellow Medium
▪ Dioxazine purple
▪ White
▪ Size 8 paintbrush
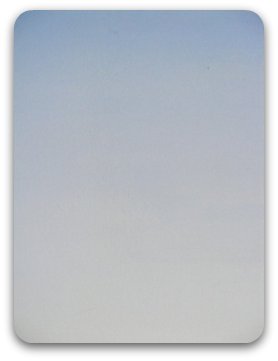
Make a large mixture of White, the barest hint of Cadmium Yellow Medium and a touch of French Ultramarine Blue, and paint a band across the bottom. Add a tiny amount of French Ultramarine Blue to your colour, and paint a band above the first one. Pull the two together so that you have a smooth blend.
Repeat this process upwards, gradually adding more French Ultramarine Blue. When you are about three quarters of the way up your canvas, start adding tiny amounts of Pthalo Blue and French Ultramarine Blue to the mix, to "cool" the highest part of the sky.
There you have it - a beautiful bright sky. The white, yellow and ultramarine blue combination is the lower part of the sky that is tainted by dust.
As you look higher up you look through less dust and into space, hence it appears cooler.
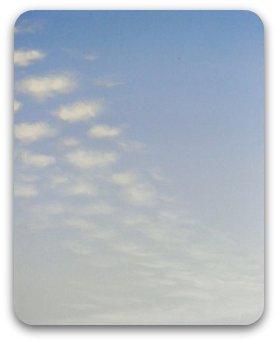
It is a good idea to exaggerate the contrast between the high and low parts of the sky a little, if you want to paint a bright day. Nothing wrecks a beautifully rendered painting more than a sky that doesn't work.
If you must add clouds, try these softer ones first. Remember to be aware of creating the illusion of atmospheric perspective. Dirty up your white a touch with the barest hints of Cadmium Yellow and Dioxazine Purple (But be careful. You only need the most miniscule amount).
Paint the clouds low to the horizon. Make them small and flattish. Add white and come up the canvas making them larger as you go. Boom.
Perspective and atmospheric perspective. Done. It should look a little like this.
Exercise Two
You will need all of the above, plus;
▪Cadmium Red or similar.
This one will help illustrate the shift from warmer to cooler when painting sunsets in your skyscapes.
For this exercise, we won't use my normal painting process. Normally I would start with the darks, and gradually work my way across the whole painting to lighter, whiter colours.
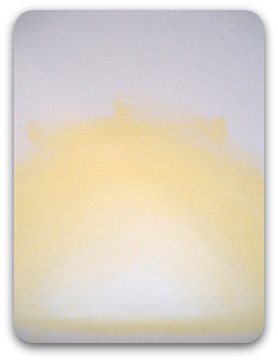
For the purposes of this exercise, I will paint the sky, and then add the clouds into the wet paint. So let's chuck some more paint around!
Take a blob of white and put it in the bottom middle of the canvas. Add a tiny bit of Cadmium Yellow Medium, brushing it in around the white, and pulling the two together. Add a touch more yellow and come out a little further.
Add a teensy bit of Dioxazine Purple, coming out and around in a circular movement around the yellow. Using a large dry brush, blend the colours together so you have a smooth-ish transition.
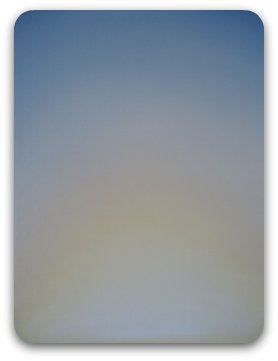
Add a tiny tiny touch of French Ultramarine Blue and continue outwards and upwards, blending nicely with a large dry brush. Add a tiny bit more French Ultramarine Blue and continue to blend upwards. A large dry house painting brush is great for pulling the colours together. Add more French Ultramarine Blue and blend almost to the top edge of the canvas.
Add more French Ultramarine Blue so that from the top edge of the canvas through to (almost) the bottom there is a lovely progression of warm through cool. You should have something that looks a bit like this.
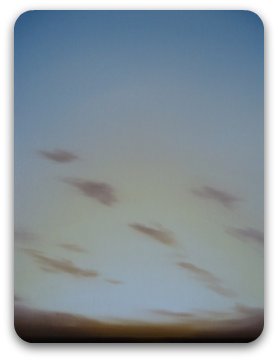
Now we are going to illustrate the shift from warm to cool with some very basic clouds. Mix together Cadmium Yellow Medium, Dioxazine Purple and touch of Cadmium Red. You should have a poo-ey purpley brown colour (more technical terms!).
Add this colour to the bottom edge of the canvas - this will give you the effect of clouds close to the horizon and close to the light source. Add more Dioxazine Purple to that mix, and add to the bottom edge of the canvas, working up into the clouds.
Add French Ultramarine Blue to that mix and add more clouds, higher up.
Making the colours cooler as you come up the canvas gives the appearance of the clouds coming toward you.
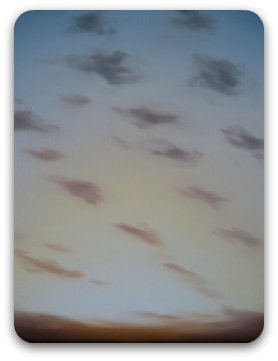
Add more Dioxazine Purple, and add more clouds higher up the canvas again. The appearance of atmospheric perspective becomes very apparent. I will add more French Ultramarine Blue to the mix, and a touch of Pthalo Blue (to really cool things down). You can really start to see the atmosphere lighting things up.
To really make your paintings come alive, you then repeat this process of warm to cool within the confines of each cloud. We use our previous mixes of colour to do this.
Start with White, add a little white to the bottom edge of the clouds closest to the light source. Blend this in with a clean dry brush. The white can be quite strong where it is very close to the light source (right in the middle).
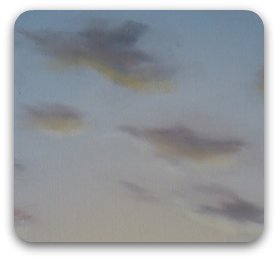
Add a touch of Cadmium Yellow Medium and add to the bottom edge of the mid-section clouds.
Add a little bit of Dioxazine Purple to the Cadmium Yellow, and then add this to the bottom edge of the clouds in the top third of the painting, and just a tiny bit in front of the Cadmium Yellow through the mid section - so that there is an apparent gradation throughout each cloud.
Add a little more Dioxazine Purple, and just add a tiny bit here and there to the bottom edge of the clouds in the top part of the sky. You should have something like this.
We have a gradation in the sky, from the source of light, up into the cooler depths of the atmosphere.
We have a transition from warm through to cool in the clouds, and we also have a transition of warmer through to cooler in each individual cloud.

While it is a simple exercise, it illustrates the effectiveness of applying the warm through to cool rule. Also the importance of mastering gradation!
Your mission, should you choose to comply, is to go through magazines and reference photos. Look for images of sunsets and sunrises. See if you can find, and highlight this warm to cool process within those images.
The more you recognise this process, and apply it to your paintings, the better your skyscapes will be.
After all, part of the process of making great paintings, is training yourself to find the information you need.
Good luck, and as always, have fun discovering what you can create!
Click here for a great, easy recipe for painting sunsets, and for a fantastic free video tutorial explaining the technique, see below!







New! Comments
Have your say about what you just read! Leave me a comment in the box below.