- Home
- Painting Tutorials
- How to Paint Water
Always Wanted To Learn How To Paint Water Realistically?
My process teaches you how to paint water, and really see water, in a whole new way.
Water is one of the most compelling subjects to paint, and yet it can all end so badly. The problem often is; where to start?
I wrestled with creating the illusion of fluidity, clarity and some semblance of realism for a long time.
Eventually I discovered a way of looking at water that allows us to recreate it in almost any circumstance.
The trick is to break it down into manageable pieces, rather than try and paint it in its entirety. When you understand how these pieces affect each other, learning how to paint water becomes much easier. You will find that you may look at water in an entirely different way.
Before we start, however, there are a couple of things I need to say. When painting something realistically there are two overriding skills needed, and particularly when learning to paint water:
- Firstly, your technical ability, or your ability to use a brush, mix colour etc.
- Secondly, your ability to observe, and find the detail necessary to create something that is convincing.
This tutorial is primarily about the "details" I use when painting water.
The next point is that this strategy is not the only way, nor possibly the best way. But it works brilliantly for me, and hopefully will for you, as you learn how to represent water in your paintings.
Now that's out of the way, let's get into it!
When learning to paint water realistically, it is important to consider that the appearance of water is made up of four elements:
- The substrate (or bottom. No, not bottoms. This is how to paint water - not how to paint figures).
- The colour of the water (determined by what is suspended in it)
- The surface of the water
- The light
Now we'll look at each of them in a little more detail:
| The Substrate |
|---|
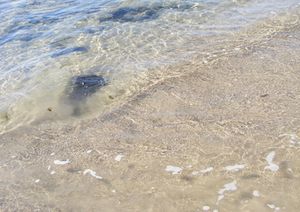
The substrate could be made up of shell, gravel, coral, river stones; or if you live in a major city, car bodies and small calibre pistols.
Whatever the substrate, depending on the other elements, you will be seeing a lot of it, or not much. Next trip to the beach, lake or swamp, check out how much of the substrate you can see.
| The Colour of The Water |
|---|
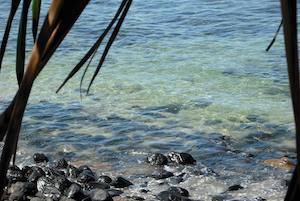
This is determined by the sediment it is carrying. After rain, chances are that the water in your local river will be tainted with sediment. After a lot of rain, sometimes there is so much sediment that seeing the bottom is almost impossible (unless the water is very shallow).
Obviously, not much sediment and clean water will minimise the impact that the colour of the water has on the substrate.
A lovely example is a lake in my area that is stained with a tannin from the trees around it.
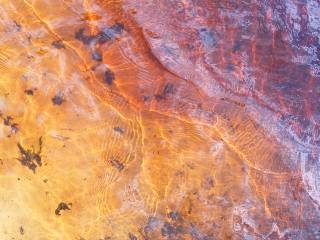
It has a fantastic reddish tinge to it, and is as dark as cola (arguably better for you than cola, despite the number of small children that swim in it). When you look at the water in this lake it is very easy to see how the colour of the water impacts the colour of the substrate.
| The Surface of The Water |
|---|
This is probably the most important element of all when learning how to paint water. The surface of the water is affected by many different things, ripples caused by wind, children splashing, boats, etc. You get the picture. The interesting thing about the surface of the water, is that it impacts the appearance of water in two ways:
- Refraction, and
- Reflection
Refraction
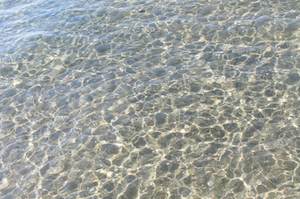
When water moves, it concentrates and dissipates light. Each wave, whether small or large, will form a lens. Light will be concentrated - forming that wonderful pattern that is thrown on the bottom of a pool just after everyone has got out.
This effect occurs to varying degrees depending on how rough or smooth the surface is, and the strength of the light. Less light = less refraction. More light = more refraction.
We'll go into some painting techniques to create this effect a little later.
Reflection
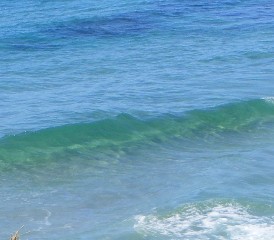
Each time a wave rises, big or small, it reflects light. Whatever is behind the wave (relative to you) needs to be represented - regardless of the substrate, and regardless of the colour of the water.
A sunlit blue sky will show a sunlit blue reflection. A beautiful sunset will reflect the beautiful sunset. That's all fairly obvious, but........ you may not have considered that each time a wave forms, its face creates a window. This allows you to see under the surface (if the water is relatively clear).
Think of the face of the wave towards you as a window to under the surface. Think of everything else as a reflection of the light. Windows and mirrors.
I've probably made all this sound more complicated than it is but I promise to show you easy ways of representing and painting the elements.
| The Light |
|---|
Thankfully we have just covered it. The light we see on the water is directly impacted by the surface. Read above Refraction and Reflection sections again for a refresher on light.
An Exercise!
Here is a painting exercise to help us understand how water appears, and help you along in your painting journey.
TIP: Have a few blank canvases around to test things on. I will often paint an aspect of a painting on a separate canvas, so I know what I am doing before I commit it to a "serious" piece.
Prepare a small canvas and imagine that we are painting a sandy bottom (Again? Really. How old are you people? You know I meant substrate - this is painting water remember!) in shallow clear water on a sunny day. I use Artists quality acrylic paints by Chroma Australia, Atelier Interactive and Atelier Free Flow.
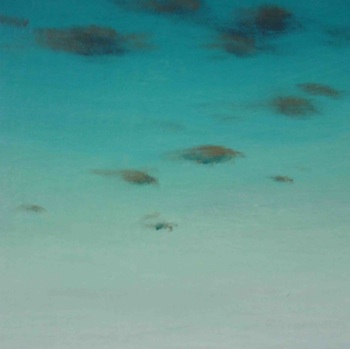
Now we want to represent each of the elements. We need to do this efficiently. We could just paint the substrate. It can be tedious to add layers of thin glazes to represent the colour of the water. We want to make the process of learning to paint water as simple as possible. It is much easier to paint the substrate (sand for example) and create the illusion of differing depths with a gradation of colour.
Preparing the canvas to this point will train you in a very important skill. Painting a controlled gradation of colour/s is something many accomplished artists struggle with. Use a largish brush (ie size 8 or 10) and plenty of paint.
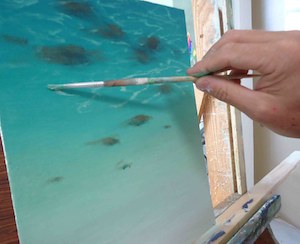
The next part of this process is to represent the refraction of light on the substrate. This is not an easy thing, however a technique I have developed makes it easier. You need to allow your brush to be controlled in an uncontrolled way. What the? It will make sense! Promise!
Find a spare canvas to practice this skill. Grab a small chisel brush size 4 or 6 and load it with paint. Make this pattern - you will need to roll your brush between your fingers whilst pushing it backwards and forwards horizontally, creating extremely loose & wobbly diamond shapes. Allow the brush to make its own way, to a certain extent.
This represents the light which is refracted by the surface of the water, down onto the substrate. Be aware that if you wish to create the illusion of distance then you must adjust the size of the "openings" as they recede into the distance. Important - you need to be aware, when applying this technique to a "proper" painting, the refraction will alter colour as it goes into deeper water.
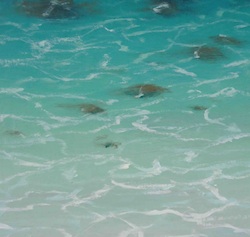
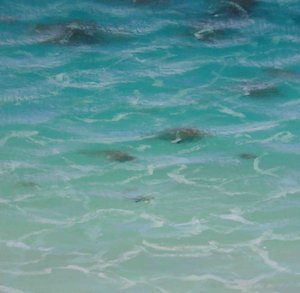
When you have experimented with this and feel comfortable with the results, you can then apply this to your exercise. Hopefully you should have painted something like this.
Now for the surface and the light. Thankfully, in this how to paint water exercise, this is relatively easy - both elements can be painted using one technique.
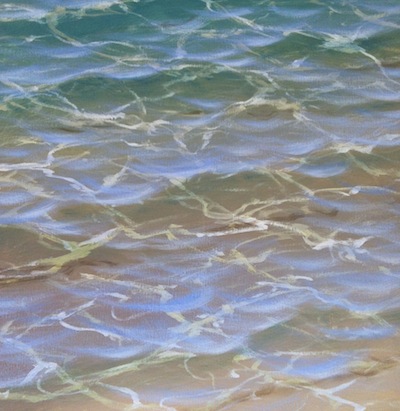
When using acrylics, the next part is easier if your previous work is dry. Make sure you have a very dry brush (size 6 or 8) with the tiniest amount of pigment and make a series of very shallow W's. These W's represent small waves and are where the light coming from behind the wave is reflected to your eye.
They seem to sit above the substrate creating the illusion of depth.
Do not paint them neatly and in rows. They will look like a backdrop for a pantomime. They should look something like this.
That's it! You have represented all of the four elements.
Whoa, hold on there. You may have noticed that the real world does not always look like your exercise. Yep, its true. It doesn't. This is where you get homework. Go out into the world and find each of these elements. Identify each one separate from the others. Identify the shapes and colours associated with each element.
Then, start looking at each of the elements and notice how much of the substrate is visible because of the colour of the water. Look at how much is visible because of the surface of the water and by default, the light. Spend some time noticing how much each of the elements affects the others in the morning, at sunset - and at other times of the day.
Build your observational skills and watch your paintings improve. Having only four elements to work with, gives you a good solid base to start.
If you find yourself stuck and want some visual assistance, I go into it in much more detail in my DVD:
My 3-pack of DVDs is now available in hard copy and downloadable format - click here for more info on my 3-pack (cheaper than buying them one at a time!).
Happy painting!
Learning how to paint water can (and should) be fun!
Dig in, its a contact sport.











New! Comments
Have your say about what you just read! Leave me a comment in the box below.