| Back to Back Issues Page |
 |
|
Acrylics Anonymous, Issue #033 -- Tis The Season To Paint Holly December 01, 2014 |
1st December 2014, issue 033 Passionate about painting with acrylics? Need a monthly fix chock full of inspiration? Need some help to take the pain out of your painting process? It's all here for you. Acrylics Anonymous. Zero elitism. Dive in. If you enjoy Acrylics Anonymous, and you know someone who might also enjoy it, you can share by forwarding it to your friends! If you are receiving this because a friend has forwarded this to you, and you would like to subscribe, click here!  Subscribers only…..shhhhhh…sealed section just for you!
Tip of the month News Links we like Works in progress…..show us your paintings! 
Every month, we will produce a Subscribers Only "sealed section". It could be a painting technique, a short video tip, or anything we can think of that we reckon you might enjoy. Please let us know what you think, we love your feedback! To leave comments, click here.

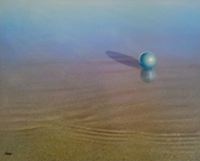
Create Some Space You don’t have to fill up every available space in your canvas. Sometimes it’s nice to leave room for the viewer to find their own story. Leaving space makes room for the viewer to ask questions, and find their own answers. 
Recipe Cards Now Here! You may’ve had previews previously (sorry ;). But the first of our Paint Recipes; Tropical Water and Sunset are now live! Download yours now, free! (Recipe packs including paint/brushes also available for purchase). Click here for more info... New Segment Coming! January will see the launch of a new section in Acrylics Anonymous, our Artist In Focus. The lucky monthly artist will be chosen from our forum, so get uploading now! Click here to have a stickybeak at the forum. Workshops in the New Year. There are still a couple of spots available in Mark's Central Coast NSW workshops in early January, including "Dolphin Dreaming" and "Coastal Foliage". Click here for more info. 
Pinterest, ahhhh. My guilty secret. Whole lifetimes have disappeared while on that site! However this time I just spent, ahem, an hour or so "researching" painting holly and came up with this beauty. You’re welcome! Want to paint some holly? Here’s some ideas. I came across Debbie’s wonderful paintings of Santa on the beach by accident one day. They somehow feel very Australian, being that it’s extremely HOT here at this time of year, even though she hails from Rhode Island! I really enjoy her vibrant beach paintings and her overall creative approach, and hope you do too! Check out Debbie’s Santa paintings and blog here. If you have a link you like, please share it with us! You can contact us to let us know. Thank you!  This is the section where you can "get your name in lights!" (well at least out there in the internet world!).
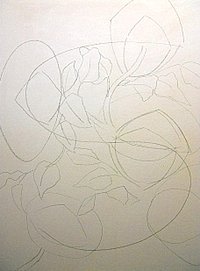
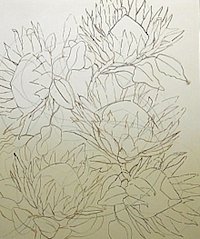
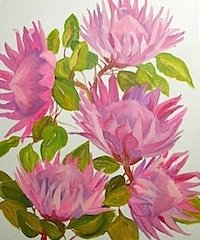
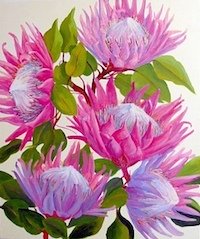
If you have works in progress you would love to show off, or finished pieces you are particularly proud of, we would love to see them! We especially like to hear about the story behind the creation. Lorraine Bezuidenhout is our wonderful contributor to our WIP section this month. Now Lorraine has done things a little differently from “normal” and has set this up as a “follow along” exercise! So……we hope you enjoy! From Lorraine: “My initial process of painting is to remove the thin canvas from the wooden frame and replace it with a lovely thick canvas. Stretching, priming and drying normally takes approximately 2 days. All the removed thin canvases are recycled by donating them to a local charity for struggling artists. This painting is fun for everyone as the style is simple and decorative. The size of the canvas is 76 x 90cm. Step 1: Decide on an S; C or U formation and the direction of your light source. Draw in the basic Protea shapes with a charcoal stick. Step 2: Using a saucer, mix either Dioxazine Purple or Burnt Umber with a little water and draw over your charcoal lines. Allow to dry, or dry with a hairdryer. Step 3: Using a sponge and a dish of water wash down the canvas. Start at the top and work down. While the canvas is still wet, wipe clean with a towel. Apply a thin coat of gesso. Allow to dry. Step 4: Mix your leaf colours using Olive Green; Indian Yellow; Opera Rose; Lemon Yellow; Alizarin Crimson and White. Keep covered and use when applying the second coat in stage 7. Step 5: Mix your protea underpainting colours using Permanent Rose, Opera Rose, Alizarin Crimson and Beige (no White). Block in your colours and allow to dry. Step 6: Mix a large dollop of your background colour and paint in, making sure that you go right up to the edges of your leaves and flowers. It is a good idea to save some of your colour in a small airtight container just as a precaution. Allow to dry. Step 7: Retouch the stems and branches using the mixture of Alizarin Crimson and Raw Umber. Apply the second coat to your leaves. Step 8: Mix your protea colours, this time using White to tint your colours. Beige; Opera rose; Indian Yellow; Permanent Rose; Alizarin Crimson; Indigo; Turquoise; Lemon Yellow and White. A lovely colour to add at the end is Quinacridone Violet. Start with the centre of each protea and then add various colours and brush strokes on the inner sides of the petals, remembering to paint White on the side where the light touches. Step 9: Continue painting the three top blooms, then to add a little interest, paint the two bottom blooms with a shadow using the blue instead of the pink. Darken a few leaves at the bottom as well. Allow to dry for a day and seal with an Acrylic Gloss or Matt sealer. I normally mix the two and then the painting is not so shiny. That’s it! Ready for framing.” Thanks so much Lorraine for submitting this fun exercise for us :) Great way to stretch and flex the painting muscles.
Hope you enjoyed this issue of Acrylics Anonymous! If you have any suggestions, comments or feedback for the ezine or our site, please don't hesitate to contact us. We hope you all have a wonderfully painty Christmas! Until next time, make sure you chuck some paint around! Cheers from Frankie & Mark :) |
| Back to Back Issues Page |

