Underpainting.
What's The Big Deal?
Discover 3 exciting possibilities of underpainting. Arrange your elements, give some texture and create color that explodes.
Your Underpainting Has Three Primary Functions:
- First: to create some texture, or build on the canvas.
- Second: To put a colour underneath your painting, allowing that to impact your final work in some way.
- Third: A way of laying out your painting to see whether all the elements balance up compositionally, and whether they “fit”.

First things first. Canvas already has a couple of coats of gesso on it (unless it’s really cheap). This fills some of the “tooth” in the canvas. BUT that may not be enough for you! Laying down some paint as part of the ground texture will reduce the texture in the canvas and give the canvas a little more body.
It’s a personal thing. I like the surface to have plenty of paint on it. The underpainting is a great opportunity to hurl a bit more paint at the canvas. Pretty straightforward.
Secondly. (And this can be combined with the first point). Adding colour to your ground. This is a wonderful technique and can be best utilised in two ways.
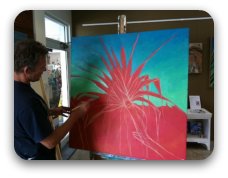
When painting impressionistically (if that’s a word!), it’s a lovely thing to leave flashes of the ground colour showing through. You can experiment with this and have a lot of fun. Try using a colour that’s quite unexpected. If your image happens to have a lot of green, as an example, do your underpainting a luscious vibrant red.
A lovely hot pink is a fantastic colour to paint over. Little flashes of hot pink through your painting can often give it a lift it would not have had. This way lends itself to throwing chunks of colour onto your canvas, and allowing the “pure” ground colour to show through.
One of the other added benefits of painting onto a coloured ground, is that you can rough in your painting in chalk. Cheap, easy to wipe off, and visible. Lots of time saved.
More time to paint!
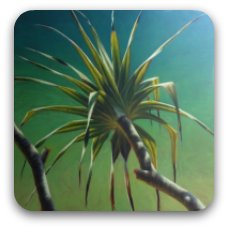
The other way to use this coloured ground is to build your painting in thin layers (glazes) over the underpainting. This is a much more subtle effect, and can change the temperature of your work quite dramatically. (So can standing in the sun, but that’s not good for your paintings or your skin). Ahem. Please excuse our poor humour.
The number of, and thickness of glazes will hide (or emphasise) your coloured ground. The wonderful thing about this technique is that each layer of glaze can create a wonderful, almost opalescent effect that is layered and “deep”.
Thirdly, whilst the other two points are important, and are fun to mess around with, this, to me is probably the most important aspect of underpainting.
Some artists like to mark out very clearly on their canvas the position of all of their elements. This is nice, but can sometimes lack the spontaneity of just hurling some paint around, and seeing where it takes you.
As your technique improves, you will become less constrained by the image you want to paint.
You are happier to move the elements around to improve the composition if necessary. Throwing a rough outline of the painting at the canvas, allows you to balance everything (and here’s the beauty of acrylics) and 20 minutes later, make adjustments if you are not happy.
Who cares if you have to move a tree over 3 inches? It’s all part of the process, and gets you closer to being happy with the finished painting (without putting your paintbrush down). It’s also another layer of paint on the canvas. (I told you I like the surface to have some body).
There’s no reason of course why you can’t throw down a coloured ground and then work your roughed up version of your painting over that colour. Two processes for one.

As usual, don’t be afraid to experiment. Remember, it’s not brain surgery - no one will die. Try some unexpected colours as grounds, and throw your painting over the top of them. I use Artists quality acrylic paints by Chroma Australia, Atelier Interactive and Atelier Free Flow.
You may just have found your next new process (or series, at least!). Fun.
Back To Acrylic Painting Techniques
Back to Explore Acrylic Painting Home Page








New! Comments
Have your say about what you just read! Leave me a comment in the box below.