Your Brush Technique.
An Important Foundation.
Explore 3 simple concepts that will
solve your brush technique problems
and expand your skills.
Trying to keep a page about brush technique concise is somewhat of a struggle. Those who know me, know that it is not easy for me to keep things short. Even harder when it is a subject as big as this one.
I never cease to be amazed at how many experienced painters struggle with their paintbrushes. I firmly believe that most people never push their brushes to the limit, they never take the time to understand the possibilities of just one brush.
Keep it simple. Particularly when just starting out. This means knowing exactly what each brush will and wonʼt do. I use chisels (flats), and mostly a 2, 4, 8, 10 + one whacking great house paint brush. I do occasionally use other brushes, but I know I can do almost whatever I want with those 5.
When you have worked with brushes for a long time, it becomes more about “will this brush do the job I need it to do?”. You develop an instinctive understanding of your needs, and the brushes capabilities. Your brush technique becomes honed.
Sorry for shouting, but…..THIS NEXT BIT IS IMPORTANT!
- When have you taken the time to work out exactly what your brushes will do?
- Pick one brush and find out how many effects can you achieve.
- How many different effects can you achieve with a dry brush?
- Have you tried loading your paintbrush up, and rolling it? Have you tried hitting the canvas with it?
- Scratching into the paint surface with the back of it?
- Or even pounding the bristles onto the bench top, so that theyʼre splayed?
- What do you currently do to improve your brush technique?
- What can you do with your brushes?
Get out a blank canvas, and find out.
Find a photo, and try to paint the image using just one paint brush.
Try and achieve the effect of rocks, of leaves, of branches……..
What ways can YOU come up to develop your own brush technique?
We like to paint for a reason. We tend to put pressure on ourselves to achieve something "finished".
What if we just got some paint and pushed it around for a while for no reason?
What if we were just trying to find out what our brushes would do?
When you really know what your brushes will do, you will find a lot more versatility, control and confidence.
Your paintings will reflect that.
Let's look at a few basic concepts that will improve our brush technique:
- Use as big a brush as possible
- Understanding the functions of your paintbrush
- Subtlety
Use As Big a Brush As Possible
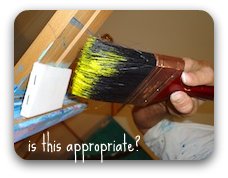
Using an “appropriate” size brush will expedite the process of making a painting. You will cover more canvas, faster.
Using a larger brush for as long as possible, will make you a better painter.
You will learn to control a brush in ways you never thought possible. As a bonus, the less often you have to change brushes, the easier it is to stay in the zone.

I sometimes find that changing brushes is a little jarring, and wrecks the continuity.
Understanding The Functions Of Your Paintbrush
We’re going to break the process of using any paintbrush into three broad groups, and further develop your brush technique:
Amount of Product Your Brush Holds:
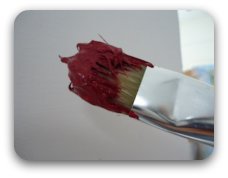
The bristles and size of your brush will determine how much product it holds.
A large brush can either be used as a trowel, or a tool for creating subtlety. A larger brush with relatively stiff bristles will pick up a huge amount of undiluted paint. It can also deliver the most minuscule amounts. Obviously a small soft liner will need a lot of thinning agent in order for the brush to hold paint. It’s bristles are not strong enough to “scoop” up solid blobs of paint.
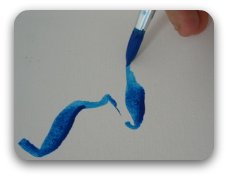
Amount of Thinning Agent You Add to Your Product:
A softer brush will need the paint to be thinned in some way, in order to allow it to penetrate into the brush and be "held" by it. Watercolour brushes are a case in point.
Softer bristles and thinned paint allows the brush to "flow". This creates wonderful opportunities for you to create thinner and thicker lines, by adjusting the pressure.
A fantastic way to assess how your brush technique is developing. Even a stiff bristled brush will hold a surprising amount of paint.
The marks you make will be completely different from those using undiluted paint.
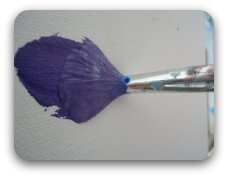
Amount of Pressure You Apply:
As a general rule the more pressure you apply - the more paint you put onto the surface, the less important the shape of the brush. Force will change the shape of the softest part of the brush. The stiffness of the bristles will probably be more noticeable than the shape, when you start applying more pressure. Spend some time experimenting with this. It will help you understand more of the nuances of your brushes.
All of this is obvious, and most of the problems we face with our brush technique can be solved by knowing these principles. Knowing what you want your brush to do and using these concepts, will usually get you out of trouble. When you get stuck, go back to the basics.
CAUTION: While apparently simple, it is also very complicated. So many different combinations of the above applications are possible your head spins. But that's the beauty of it. Your solution is there amongst those possibilities. Often, the solution is in the next subject. (!)
Subtlety
The concept of a “feather touch” seems very difficult to grasp in the early stages of developing your brush technique, particularly when using a larger brush.
It seems particularly difficult to go from the process of blocking in (using your paintbrush like a house painter - lots of paint and a loose approach), to a more subtle and gentle approach when moving to more detailed work.
An Exercise In Subtlety:
This exercise creates some wonderful effects that can be immediately useful for your paintings. It requires a very soft approach.
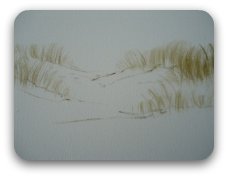
Grab yourself a size 12 brush. Dry it completely. Dip the tip of the brush into undiluted paint (whatever colour works for you). Work off most of the paint so that you have a tiny quantity remaining. Drag the brush very gently over the surface. You will notice that the brush picks up only the highest parts of the canvas. See how little paint you can apply.
The less paint on the brush, the more passes you will have to make over the surface. It sounds obvious, and it happens to be a sensational technique. You can add “grain” to a very flat surface with one (very soft) sweep.
Add a tiny bit of thinner (water or medium). Apply the same process using the tip of the brush very gently, and you have just recreated the wonderful seagrass that grows all over our beaches. A gentle and judicious application of this technique allows you to form sand dunes, or the sunlit tips of long grass.
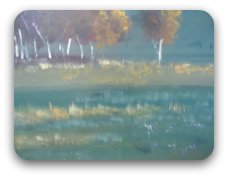
All of this highlights the versatility of one paintbrush.
All we’ve done so far is explored some simple applications of the three functions above.
Next time you struggle with something, look at these three functions.
If you adjust one of them, will it get you what you want? Will it solve your problem?
My advice: learn to master a few paintbrushes, before investing in a pile of very expensive ones. I’m not saying you shouldn’t buy expensive brushes, and I’m not saying you shouldn’t have a large amount of different brushes. BUT. Know the ones you have, intimately.
When you understand the possibilities of one paintbrush, and you can skillfully manipulate that brush, your ability to pick up any paintbrush and use it well increases. You develop a “feel” for how much paint it will hold; how much pressure to apply, and whether to thin the paint to achieve a desired effect.
A racing car driver can probably drive your old bomb a lot faster than you can, despite never having driven it before. He understands his medium. He has a feel for the tools of his trade. Remember also, he did not do all his practice in actual races.
The subject of brush technique is huge. I've tried to break it down to the basics. Hopefully, some of the pain may now be gone, and you can get back to doing what you should be, which is having fun poking paint around!
Back To Acrylic Painting Techniques
Back to Explore Acrylic Painting Home Page









New! Comments
Have your say about what you just read! Leave me a comment in the box below.